Before you begin fundraising or ticketing experience, you’ll need to register your school and confirm some account details.
Create an Account
- Enter your personal information with one click using an already existing Google, Facebook, or Apple account. Alternatively, manually enter your own first and last name (not your organization name, which you will enter in the next step), email address, and password:

- Enter your organization’s location, 501(c) status, and name, and select Start Fundraising:

- Select Finish account setup:

- Connect an existing Stripe or PayPal account, or create a new one:
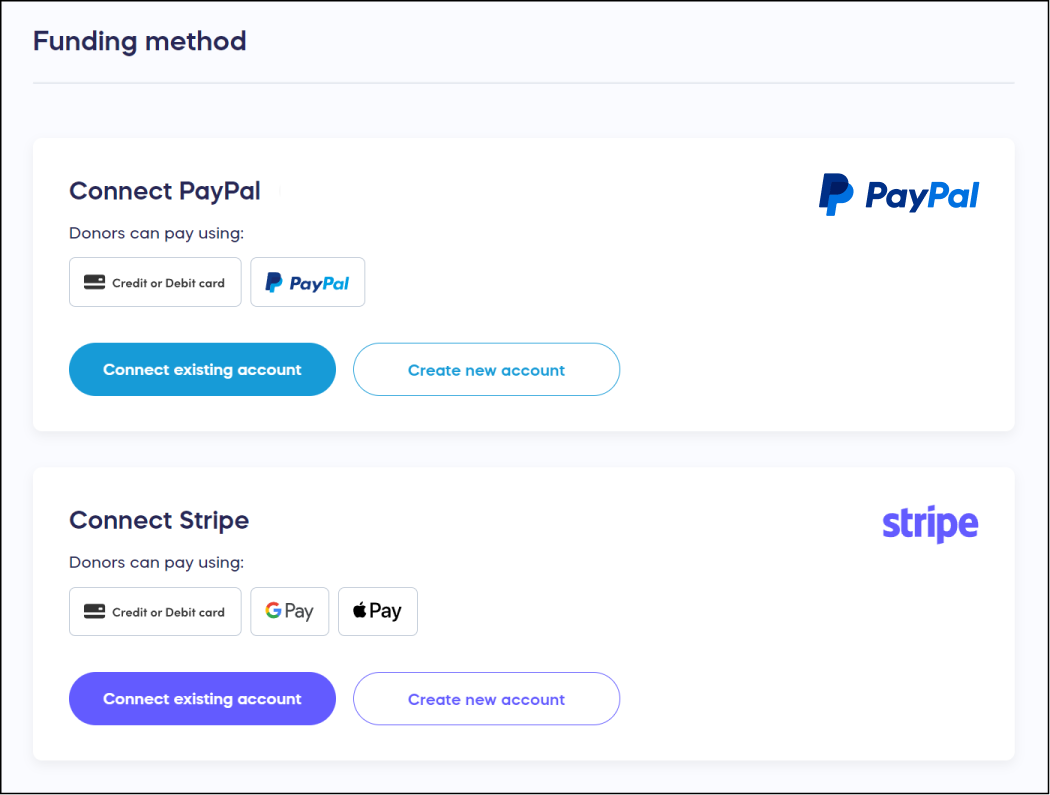
You can learn how to set up your payment processor by reading: How-to: Set Up Direct Funds. Once you’ve successfully connected your payment processor, you’re ready to begin fundraising.
Additional Knowledge Base Articles
Before you begin fundraising, consider reading the following Knowledge Base articles to discover ways to reach new donors and raise more funds:
Complete Your Organization Profile
Consider adding your logo, a description of your school, your school’s website, and social media links to appear on your fundraising page.
How Do I Add a Description of Our School?
Add Custom Branding
Customize your fundraising pages using the available branding options for your account.
Understand: Branding Your Account
Invite Your Team
Invite others in your school to create and manage fundraisers.
Add Users to Your School Account
Empower Your Supporters
Invite an individual or business to run a charity giveaway on your school’s behalf.
Allow a Supporter to Create a Raffle or Sweepstakes for your School
Make Donating Easy
Set up a Donation Page for collecting one-time or recurring donations on an ongoing basis.